Flask with SQLAlchemy & Marshmallow
In the article we will build a simple REST API using Flask, SQLAlchemy and Marshmallow. We will be building a note taking application where these two API endpoints /note/ and /note/<id>/ will be available.
We will be able to create new note or get all the notes by doing a POST or a GET request to /note/ api endpoint. Not only that we will be able to get the details of the note or update the note or delete the note with a GET or a PATCH or a DELETE request to /note/<id>/ api endpoint.
First of all, we will give a brief descriptions of the libraries that we will be using in this article.
Flask is a lightweight WSGI web application framework in Python. It is designed to make getting started very quickly and very easily.
marshmallow is an ORM/ODM/framework-agnostic library for converting complex datatypes, such as objects, to and from native Python datatypes.
Flask-Marshmallow is a thin integration layer for Flask and marshmallow that adds additional features to marshmallow.
SQLAlchemy is the Python SQL toolkit and Object Relational Mapper that gives application developers the full power and flexibility of SQL.
Flask-SQLAlchemy is an extension for Flask that adds support for SQLAlchemy to your application. It aims to simplify using SQLAlchemy with Flask.
marshmallow-sqlalchemy An SQLAlchemy integration with the marshmallow (de)serialization library.
We will be using pipenv as our dependency manager. We are assuming that pipenv is already installed in your system.
Follow the steps bellow and at the end you will have a simple note application running on http://localhost:5000/.
Step 1: Setup Project Environment
pipenv --three
Step 2: Install Flask and Other Dependencies
Run the following commands to install all the dependencies including Flask.
pipenv install flask
pipenv install flask-marshmallow
pipenv install flask-sqlalchemy
pipenv install marshmallow-sqlalchemy
After running those commands marshmallow and SQLAlchemy will be installed internally as dependency.
Step 3: Create app.py File
touch app.py
Step 4: Add This Code to app.py File
from flask import Flask

app = Flask(__name__)

@app.route('/')
def hello_world():
    return 'Hello, World!'

if __name__ == '__main__':
    app.run(debug=True)
Step 5: Start pipenv Shell
pipenv shell
Step 6: Run Flask Server
python app.py
Step 7: Go to the Browser
Start your favorite browser and go to the http://localhost:5000/ url and you will see Hello, World! printed.
Step 8: Integrate SQLAlchemy & Marshmallow
Add the following imports into the app.py file.
import os
from flask_sqlalchemy import SQLAlchemy
from flask_marshmallow import Marshmallow
And add the following code after the creation of Flask app instance.
basedir = os.path.abspath(os.path.dirname(__file__))
app.config['SQLALCHEMY_DATABASE_URI'] = 'sqlite:///'+ \
                os.path.join(basedir, 'db.sqlite3')

db = SQLAlchemy(app)
ma = Marshmallow(app)
Step 9: Create Model
Declare the model like following.
class NoteModel(db.Model):
    id = db.Column(db.Integer, primary_key=True)
    title = db.Column(db.String(100))
    content = db.Column(db.String(255))

    def __init__(self, title, content):
        self.title = title
        self.content = content
Step 10: Create Schema
Generate marshmallow schema from the model.
class NoteSchema(ma.SQLAlchemyAutoSchema):
    class Meta:
        model = NoteModel
Step 11: Build Out API Actions
@app.route('/note/')
def note_list():
    all_notes = NoteModel.query.all()
    return jsonify(notes_schema.dump(all_notes))


@app.route('/note/', methods=['POST'])
def create_note():
    title = request.json.get('title', '')
    content = request.json.get('content', '')

    note = NoteModel(title=title, content=content)

    db.session.add(note)
    db.session.commit()

    return note_schema.jsonify(note)


@app.route('/note/<int:note_id>/', methods=["GET"])
def note_detail(note_id):
    note = NoteModel.query.get(note_id)
    return note_schema.jsonify(note)


@app.route('/note/<int:note_id>/', methods=['PATCH'])
def update_note(note_id):
    title = request.json.get('title', '')
    content = request.json.get('content', '')

    note = NoteModel.query.get(note_id)

    note.title = title
    note.content = content

    db.session.add(note)
    db.session.commit()

    return note_schema.jsonify(note)


@app.route('/note/<int:note_id>/', methods=["DELETE"])
def delete_note(note_id):
    note = NoteModel.query.get(note_id)

    db.session.delete(note)
    db.session.commit()

    return note_schema.jsonify(note)
Step 12: Setup Database
Enter in python shell
python
>> from app import db
>> db.create_all()
Step 13: Test APIs
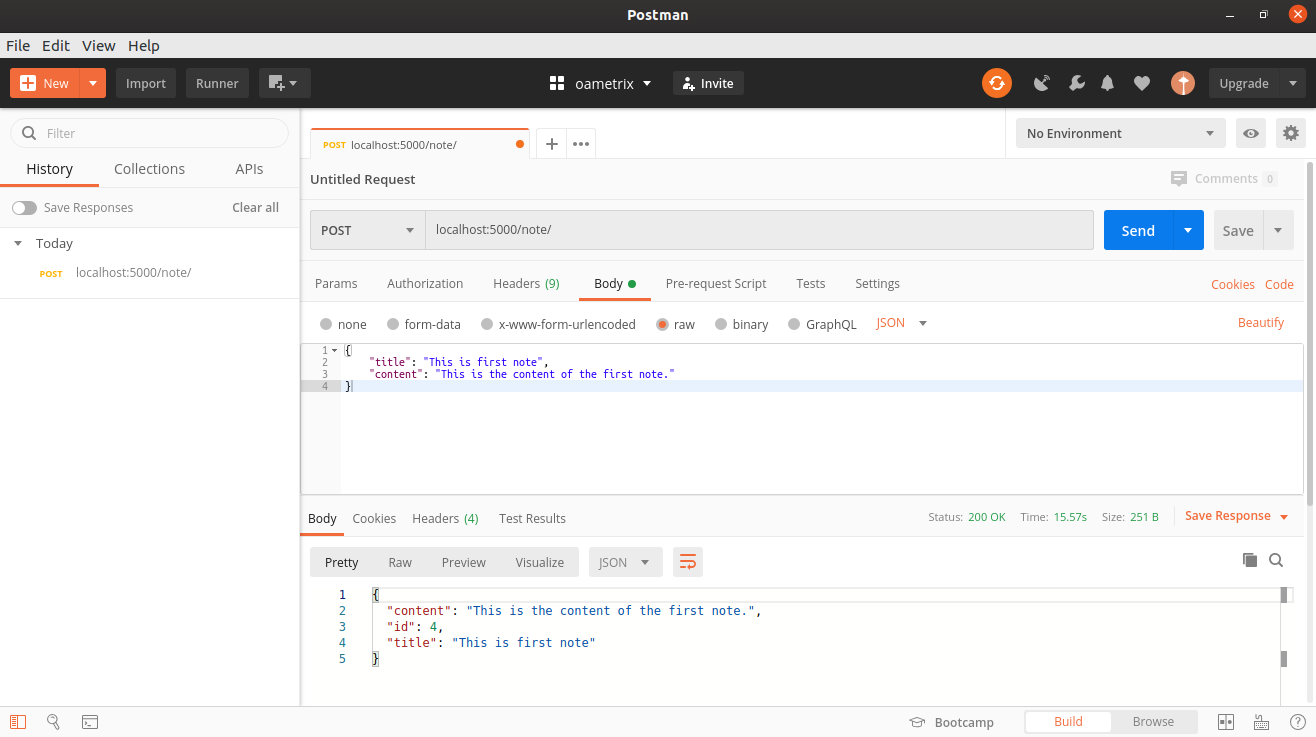
We can use the tool Postman to test our APIs. But before that please ensure your development server is up and running using this command python app.py from Step 6.

The complete code of this article can be found on this repository.
